I tried to use spacers that came with one of my gun holsters. I wanted something that could clamp down slightly so I could achieve adequate tightness. It was not a good fix for the toe in but on a positive note keeps the bottoms of the bolts in place. I will likely replace with washer and hex nut to keep bolts secure as they tend to back out of bottom of length master and effect tightness.

With DLD's approval I'd like to drill two holes lower to current ones. I thunk that will shift the clamp angle to more neutral or slight toe out.
 

Attachments

  • 20190623_143907.jpg
    20190623_143907.jpg
    2.1 MB · Views: 23
The ones that came with my tv mounting system are too long and wouldn't allow the amount if compression I need. The link you posted was $19. These are made out of silicone I believe but maybe have too much give to them. I was planning on switching out for a washer and hex nut, maybe I can just stack 2 or 3 nuts to act as the same thing you posted. Will report back. If that doesn't work I'll go ahead with new holes which should solve things.
 
The ones that came with my tv mounting system are too long and wouldn't allow the amount if compression I need. The link you posted was $19. These are made out of silicone I believe but maybe have too much give to them. I was planning on switching out for a washer and hex nut, maybe I can just stack 2 or 3 nuts to act as the same thing you posted. Will report back. If that doesn't work I'll go ahead with new holes which should solve things.

You can also cut down those tv mount stand offs. The ones I posted are not silicone, they ABS which is a very hard plastic. You can order smaller packs as well for less money. Or get some large nuts like you mentioned and stack them. Make sure they are larger than the 1/4" bolt that the LengthMaster ships with.
 
Yes I'll keep that in mind too if the nuts do not work, thanks for this idea. I was referring to the spacers I used being a hard silicone material for my gun holster, the ones you posted are the same plastic as legos and I'll look into cheaper options as well.
 
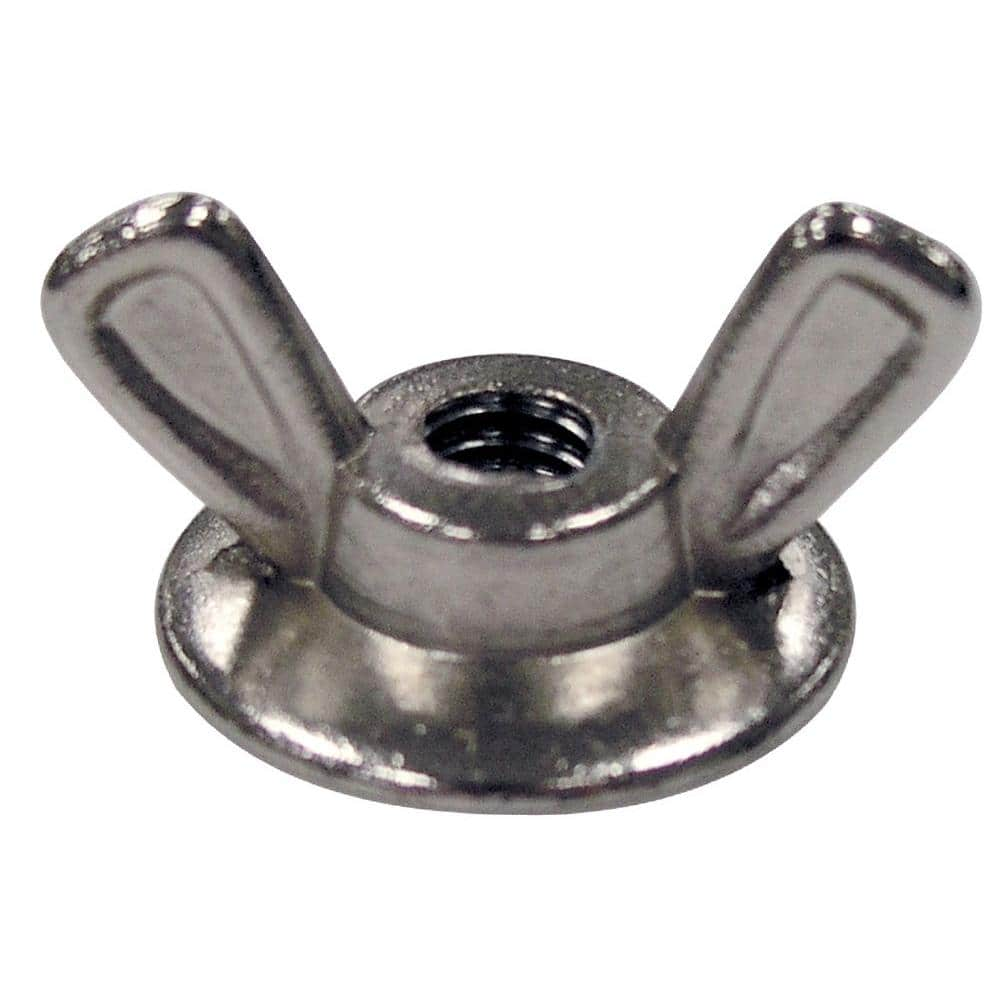
Washer Wing Nuts are another cheap option that will work great and are adjustable and you can get at any hardware store.

The washered wing-nut on the top and bottom of the top portion of the bundle chamber will secure it from tilting due to isolating the top portion of the bundle chamber with the built in washer. You can adjust the bottom (right-side down) washered wing nut to accommodate any girth. The wings will be far enough away from the penis or you can turn them so the wings are parallel to the penis. With this method you can tweak to any girth and not worry about stacking bolts not stacking up to the proper girth and falling off every time you change sessions.

You can even add a third one right-side up on top of the bottom portion of the bundle chamber to secure the bundle chamber to the power assist. It will then be solid as a rock.

We will probably start including these with future LM orders.

This is a side profile

WingNut.jpg

I will grab some this week and let you know how it worked.

Here is a link to the wing-nut I am talking about. You don't need 200 obviously but you can buy them individually for under $1

 
Last edited:
This thread needs to be combined with the LM wrapping thread.
Topics and questions are identical and the information is relevant to both threads.
 
  • Like
Reactions: DLD
This thread needs to be combined with the LM wrapping thread.
Topics and questions are identical and the information is relevant to both threads.

I agree I just don’t know how to do it so let me be sure what I’m doing before I even try.
 
Ok it wasn't a complete fix, however the angle is not as sharp. Plus it helps keep the bolts put and makes the hanger feel much more solid. Luckily I had hex nuts left over from when I made my tiger trap. I think im going to try only one nut and go with that as it'll provide more compression forces. I would love to drill a hole lower on the wings if okay with DLD. If it works for me it'll be an easy fix for many men and could lead to lengthmaster 3.0
 

Attachments

  • 20190624_195649.jpg
    20190624_195649.jpg
    323.5 KB · Views: 20
I just also turned it around, had to move the nylon strap out of the way, but it was so much more comfortable. This could be a work around for those who want to have a toe out and to use it with the PA but without using it as a hanger
 

Attachments

  • 20190624_201044.jpg
    20190624_201044.jpg
    574.8 KB · Views: 22
  • 20190624_201034.jpg
    20190624_201034.jpg
    551 KB · Views: 22
Those nuts are not wide enough to give the proper stability to keep the chambers from tilting. Thats why I was suggesting wide washer wing nuts or you can grab 1/2" or 3/4" pvc plumbing white pipe to cut spacers as well to give you a solid flat plane.
 
Those nuts are not wide enough to give the proper stability to keep the chambers from tilting. Thats why I was suggesting wide washer wing nuts or you can grab 1/2" or 3/4" pvc plumbing white pipe to cut spacers as well to give you a solid flat plane.
Hmmm very interesting. I have larger washers, maybe I stack them over the hex nuts
 
Hmmm very interesting. I have larger washers, maybe I stack them over the hex nuts

They are going to still tilt. The weakest link are the small diameter nuts. I have those wing washers coming in tomorrow, I will post how those work.
 
Per Lightning’s advice I used 7/8” diameter OD washers and made the thickness 3/8” and it worked great.
I still use my same wrap with the build up on the base side but I really like the tweak.

18221237C07363C-F882-448E-8F3E-F3DB240CFB17.jpeg
 
Last edited:
Very nice. Glad we will see a fix. It is a great time to get the Lengthmaster and review it to help us make modifications and improvements. I love that ability we have here to make changes quickly as we so desire.
 
Ok just as I feared. The leading edge is always stopped first and that is the front. I notice Mike03016 has made some hole modifications and I guess I will too if I want a fix.
 

Attachments

  • 20190625_200707.jpg
    20190625_200707.jpg
    452.7 KB · Views: 21
Ok just as I feared. The leading edge is always stopped first and that is the front. I notice Mike03016 has made some hole modifications and I guess I will too if I want a fix.

Your spacers/washers holes are too wide, it appears the holes on the spacers/washers are wider than the bolts and shifting to cause the tilt. They seem to be tilting with the chamber due to not screwing them down tight enough in addition to being lose as you will see the washers are not evenly lined up.

You need a solid spacer in between the chambers so they can tighten down perfectly to make the two chambers solid as one piece. The spacers you are using are acting as links and each one is gonna do their own thing if they are not tight to the bolts and chambers.

Screenshot_20190625-211644_Chrome.jpg
 
Last edited:
Your spacers/washers holes are too wide, it appears the holes on the spacers/washers are wider than the bolts and shifting to cause the tilt. They seem to be tilting with the chamber due to not screwing them down tight enough in addition to being lose as you will see the washers are not evenly lined up.

You need a solid spacer in between the chambers so they can tighten down perfectly to make the two chambers solid as one piece. The spacers you are using are acting as links and each one is gonna do their own thing if they are not tight to the bolts and chambers.

View attachment 1822129

Thanks ??
 
Back
Top Bottom